Using S3 in Dropover
Use your Amazon S3 or compatible bucket to store files from Dropover and share them with a simple link.
Getting Started
To use S3 in Dropover, you'll first need to configure it. Here's how to get set up:
- Open the Dropover settings
- Select Cloud Sharing from the sidebar
- Click the + button and choose S3
- Enter your credentials, bucket name, and region
Note: Starting with Dropover 5.0.3, you can also connect S3-compatible storage providers (like Cloudflare R2, Backblaze, etc.). See the instructions below.
This is the minimum configuration required to begin uploading files.
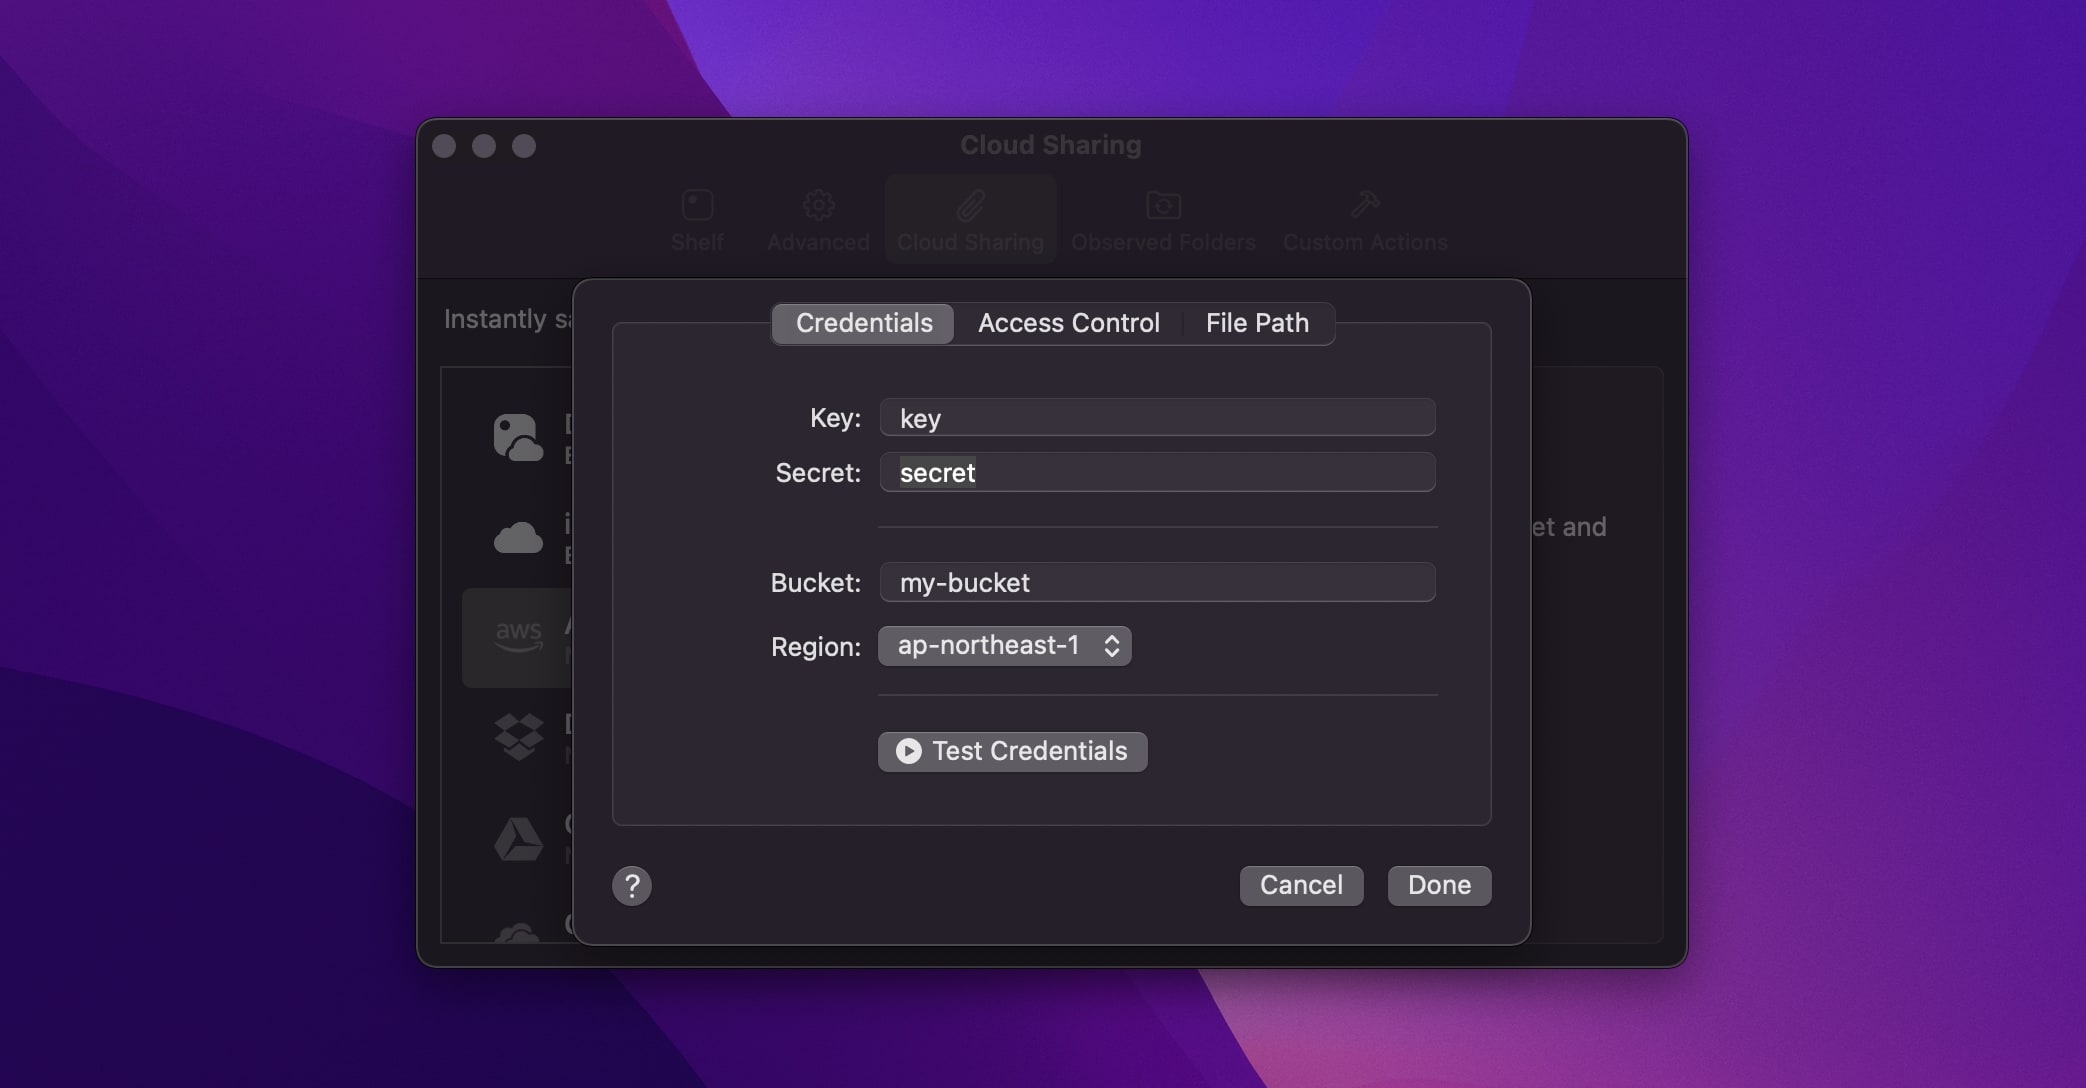 To configure Amazon S3 in Dropover, enter the credentials, bucket and region.
Access Control
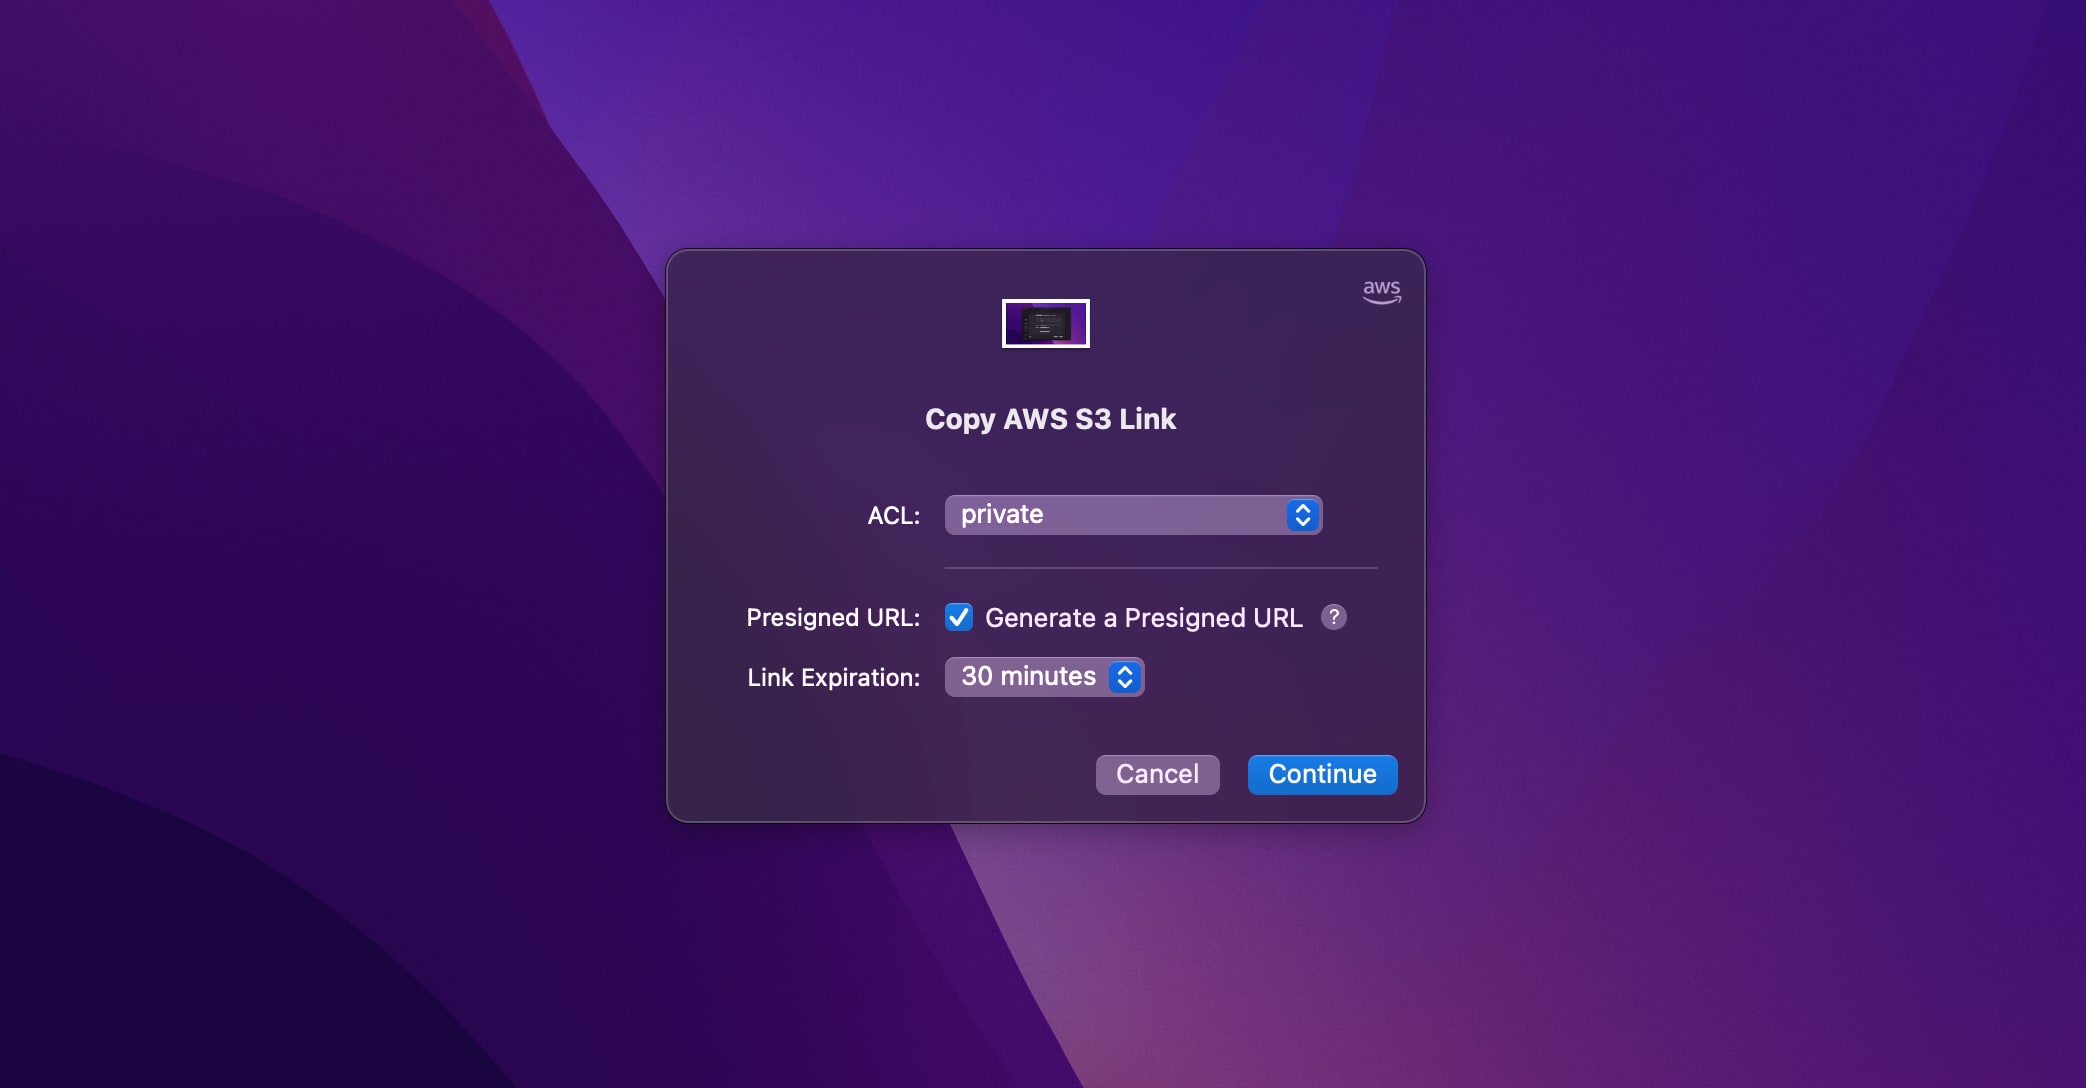
The Access Control tab lets you define which ACL (Access Control List) should be applied to each upload by default. You can also specify whether to use a presigned URL with an optional expiration time.
When "Generate a Presigned URL" is enabled, Dropover will generate a secure link that allows anyone with the URL to access the file — but only until the set expiration time has passed.
File Path
The File Path tab allows you to customize the destination path for uploaded files inside your S3 bucket. Unlike access control settings, this path applies globally and cannot be changed per upload.
By default, files are uploaded to: <S3 Bucket>/Dropover/<UUID>/<Filename>
You can customize this path using dynamic components, which will be automatically replaced at upload time:
- UUID: A unique identifier for each upload
- Filename: The uploaded file’s name, including its extension
- Date: The current timestamp in
yyyyMMddHHmmssformat
To use a component, simply drag it into the input field.

S3-Compatible Provider Configuration
To use an S3-compatible provider — such as Cloudflare R2 or Backblaze B2 — select the "S3-Compatible Provider" option from the provider dropdown menu. For these providers, you’ll need to manually enter the endpoint URL.
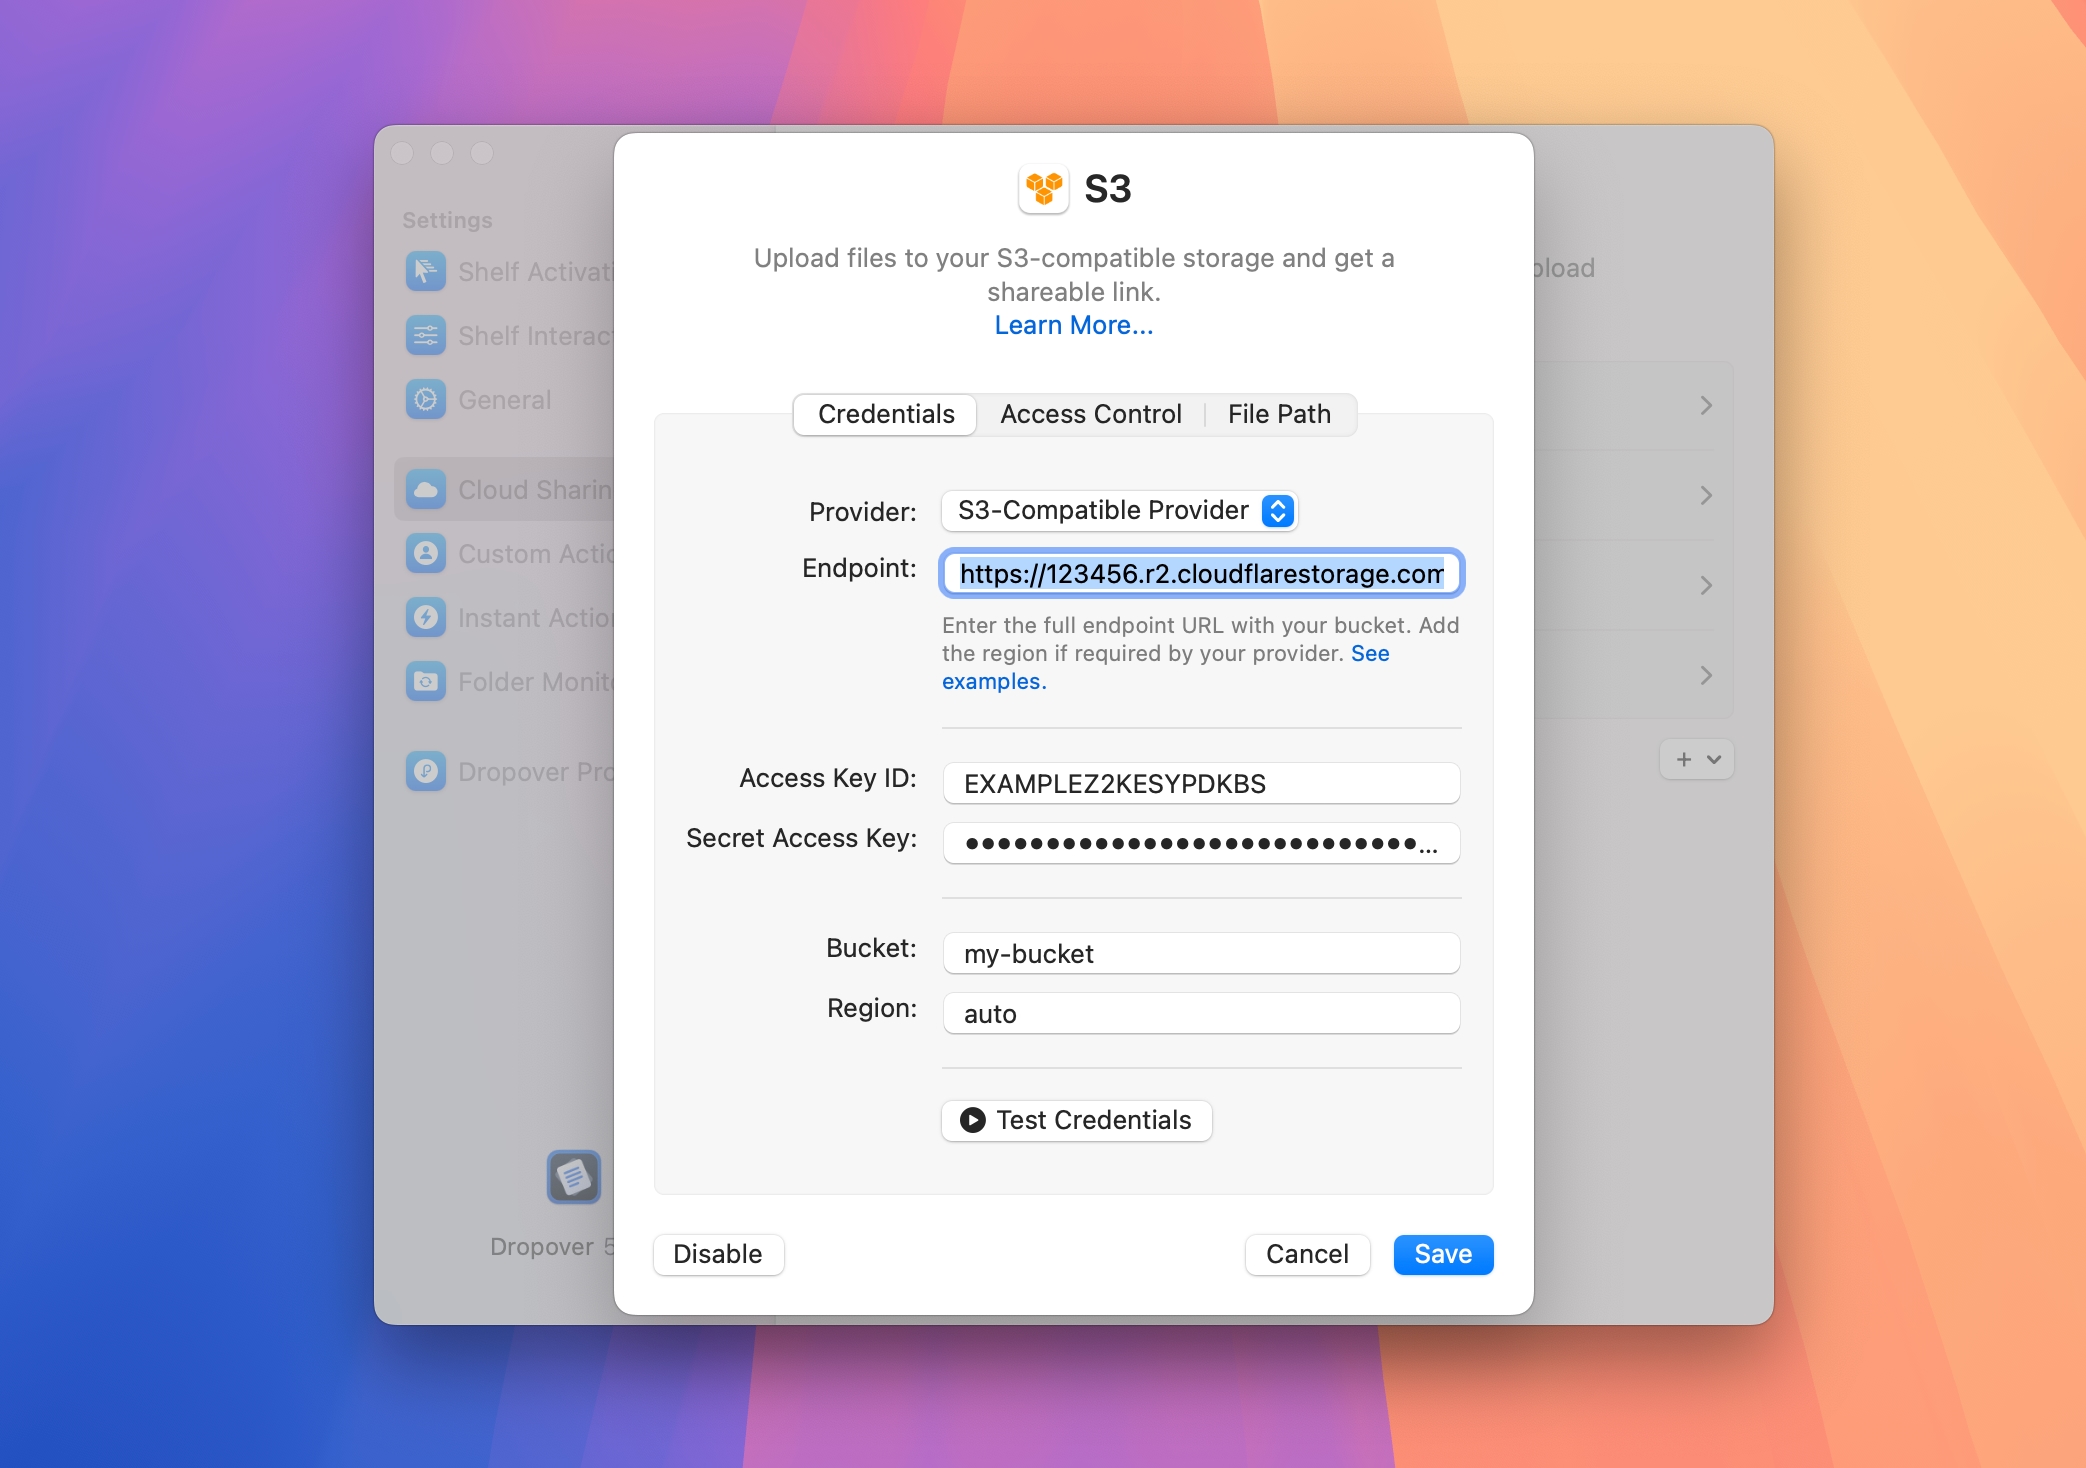 From Dropover 5.0.3, you can configure a S3-compatible provider.
Endpoint
The endpoint must be a full URL, including the bucket name and region (if required). Below are examples of valid endpoint formats for several S3-compatible providers:
| Provider | Full Endpoint Example |
|---|---|
| Cloudflare R2 | https://account-id.r2.cloudflarestorage.com/bucket |
| Backblaze B2 | https://bucket.s3.us-west-001.backblazeb2.com |
| Wasabi | https://s3.us-west-1.wasabisys.com/bucket |
| Scaleway | https://bucket.s3.nl-ams.scw.cloud |
| DigitalOcean Spaces | https://bucket.nyc3.digitaloceanspaces.com |
| Linode Object Storage | https://bucket.us-east-1.linodeobjects.com |
Region
For most S3-compatible providers, it's recommend to set the region to
auto, unless your provider explicitly requires a region.
Uploading Files
Once you’ve configured S3 in Dropover, you can begin uploading files.
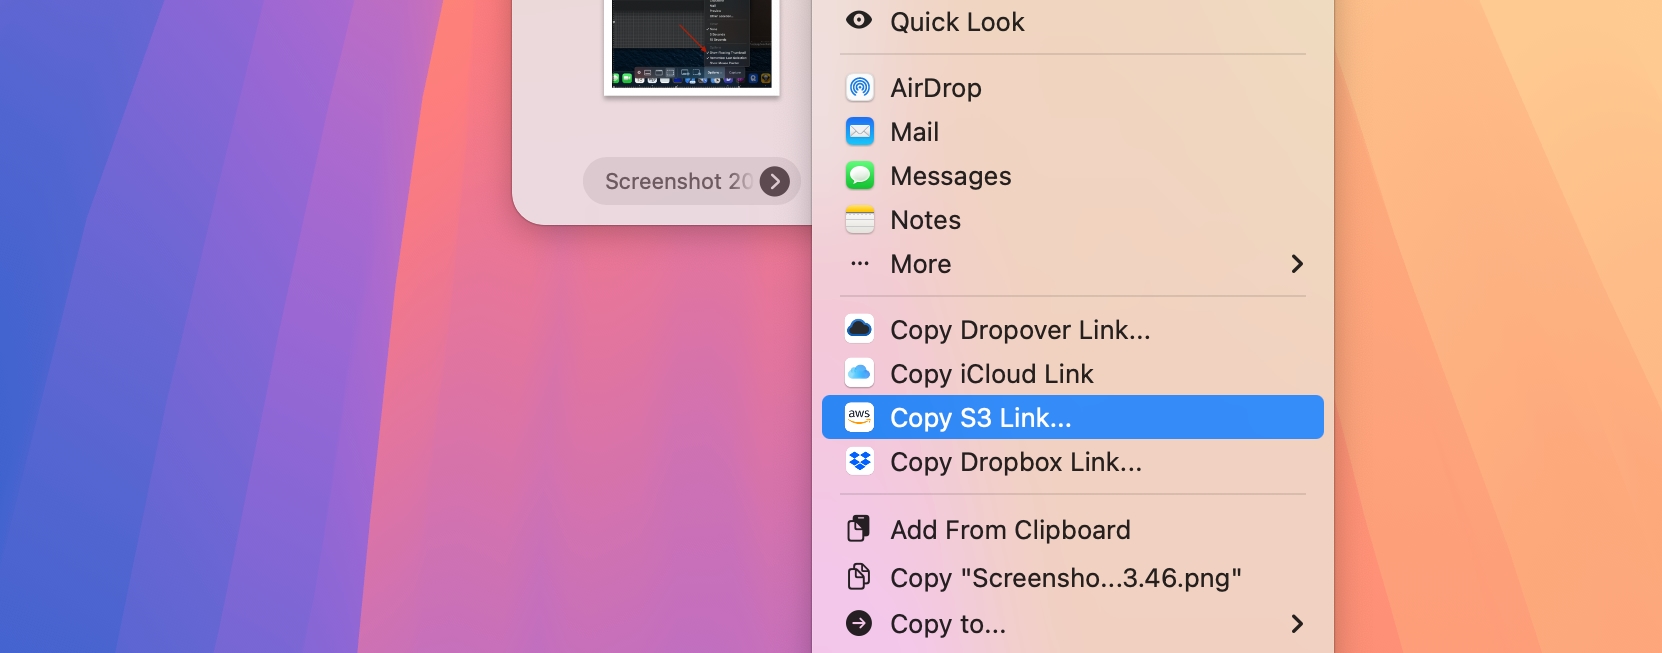
Simply click the shelf action button (•••) and choose
"Copy S3 Link". A modal will appear, allowing you to customize the ACL or choose to generate a presigned link.
Dropover will then upload the contents of your shelf to the configured S3 bucket. If the shelf contains multiple files, they will be combined into a single ZIP file for upload. Once the upload is complete, a shareable link will be copied to your clipboard.
Deleting Files
You can delete uploaded files using the "Recent Uploads" menu item in the menu bar. Dropover will attempt to delete the uploaded file using the credentials currently saved in your preferences.
FAQ
What kind of data does Dropover store for S3 uploads?
Dropover securely stores your credentials (key, secret, and bucket) in the macOS Keychain. These credentials are used to generate the signature required for each request's authorization header, as described here.
Additional preferences, such as ACL settings and custom destination paths, are stored locally on disk to streamline future uploads.
To support the "Recent Uploads" feature for viewing and deleting past uploads, Dropover also saves the following metadata locally:
- URL: The URL of the uploaded file
- Path: The destination path within the bucket
- Bucket: The bucket name used for the upload
- Region: The AWS region of the bucket
Are there any limits?
The only limitation is that individual files cannot exceed 4GB in size.
How can I disable S3 in Dropover?
To disable S3, open the Cloud Sharing item in Dropover's settings, select S3 and then click the "Disable" button. This will also remove your stored credentials from the Keychain.
To clear records of recent uploads, delete each entry from the "Recent Uploads" menu item in the menu bar.
Does Dropover support custom domains?
Custom domains are not supported at this moment.
Does Dropover support all AWS regions?
Yes, Dropover supports all official Amazon S3 regions. You can enter your desired region manually,
or leave it set to auto for most S3-compatible providers.
Can I customize the link format or domain of the generated URL?
Not at this time. Dropover generates public URLs based on the endpoint and bucket provided. If you want to use a custom domain, you’ll need to configure that within your S3 provider separately.
What happens if I upload the same file twice?
The new file will overwrite the existing one at the same destination path.
To avoid overwriting, you can include dynamic components like UUID or Date
in your upload path.
Can I see logs or upload history?
Yes. Dropover tracks uploaded files in the "Recent Uploads" menu. This includes the uploaded file’s name, path, and link. Note: Dropover does not currently keep detailed logs beyond this view.
Does Dropover support folder uploads?
Not directly. However, if you drag a folder onto Dropover, it will be automatically zipped before upload — so you can still upload entire folders as a single archive.
What does "Test Credentials" do exactly?
If you want to quickly verify that your entered credentials are valid, click the "Test Credentials" button. Dropover will upload a small text file to the configured bucket and then immediately delete it. If this process succeeds, it means your credentials are working correctly.