Custom Scripts
Dropover allows you to add your own scripts to perform custom operations on the files in the shelf. These actions will appear inside the “Actions” menu item of the shelf menu. You can add your own Shell scripts or Automator Workflows.

Adding a Script
To add a script, open Dropover’s setting screen and and select the “Advanced” tab. From there, select the “Manage Custom Scripts” buttom which, will open a new screen where you can import your scripts.
Important: Only scripts that are in the Dropover “Application Scripts” directory can be imported, so make sure to first put your scripts there.
Script Options
You can customise the behavior of each script:
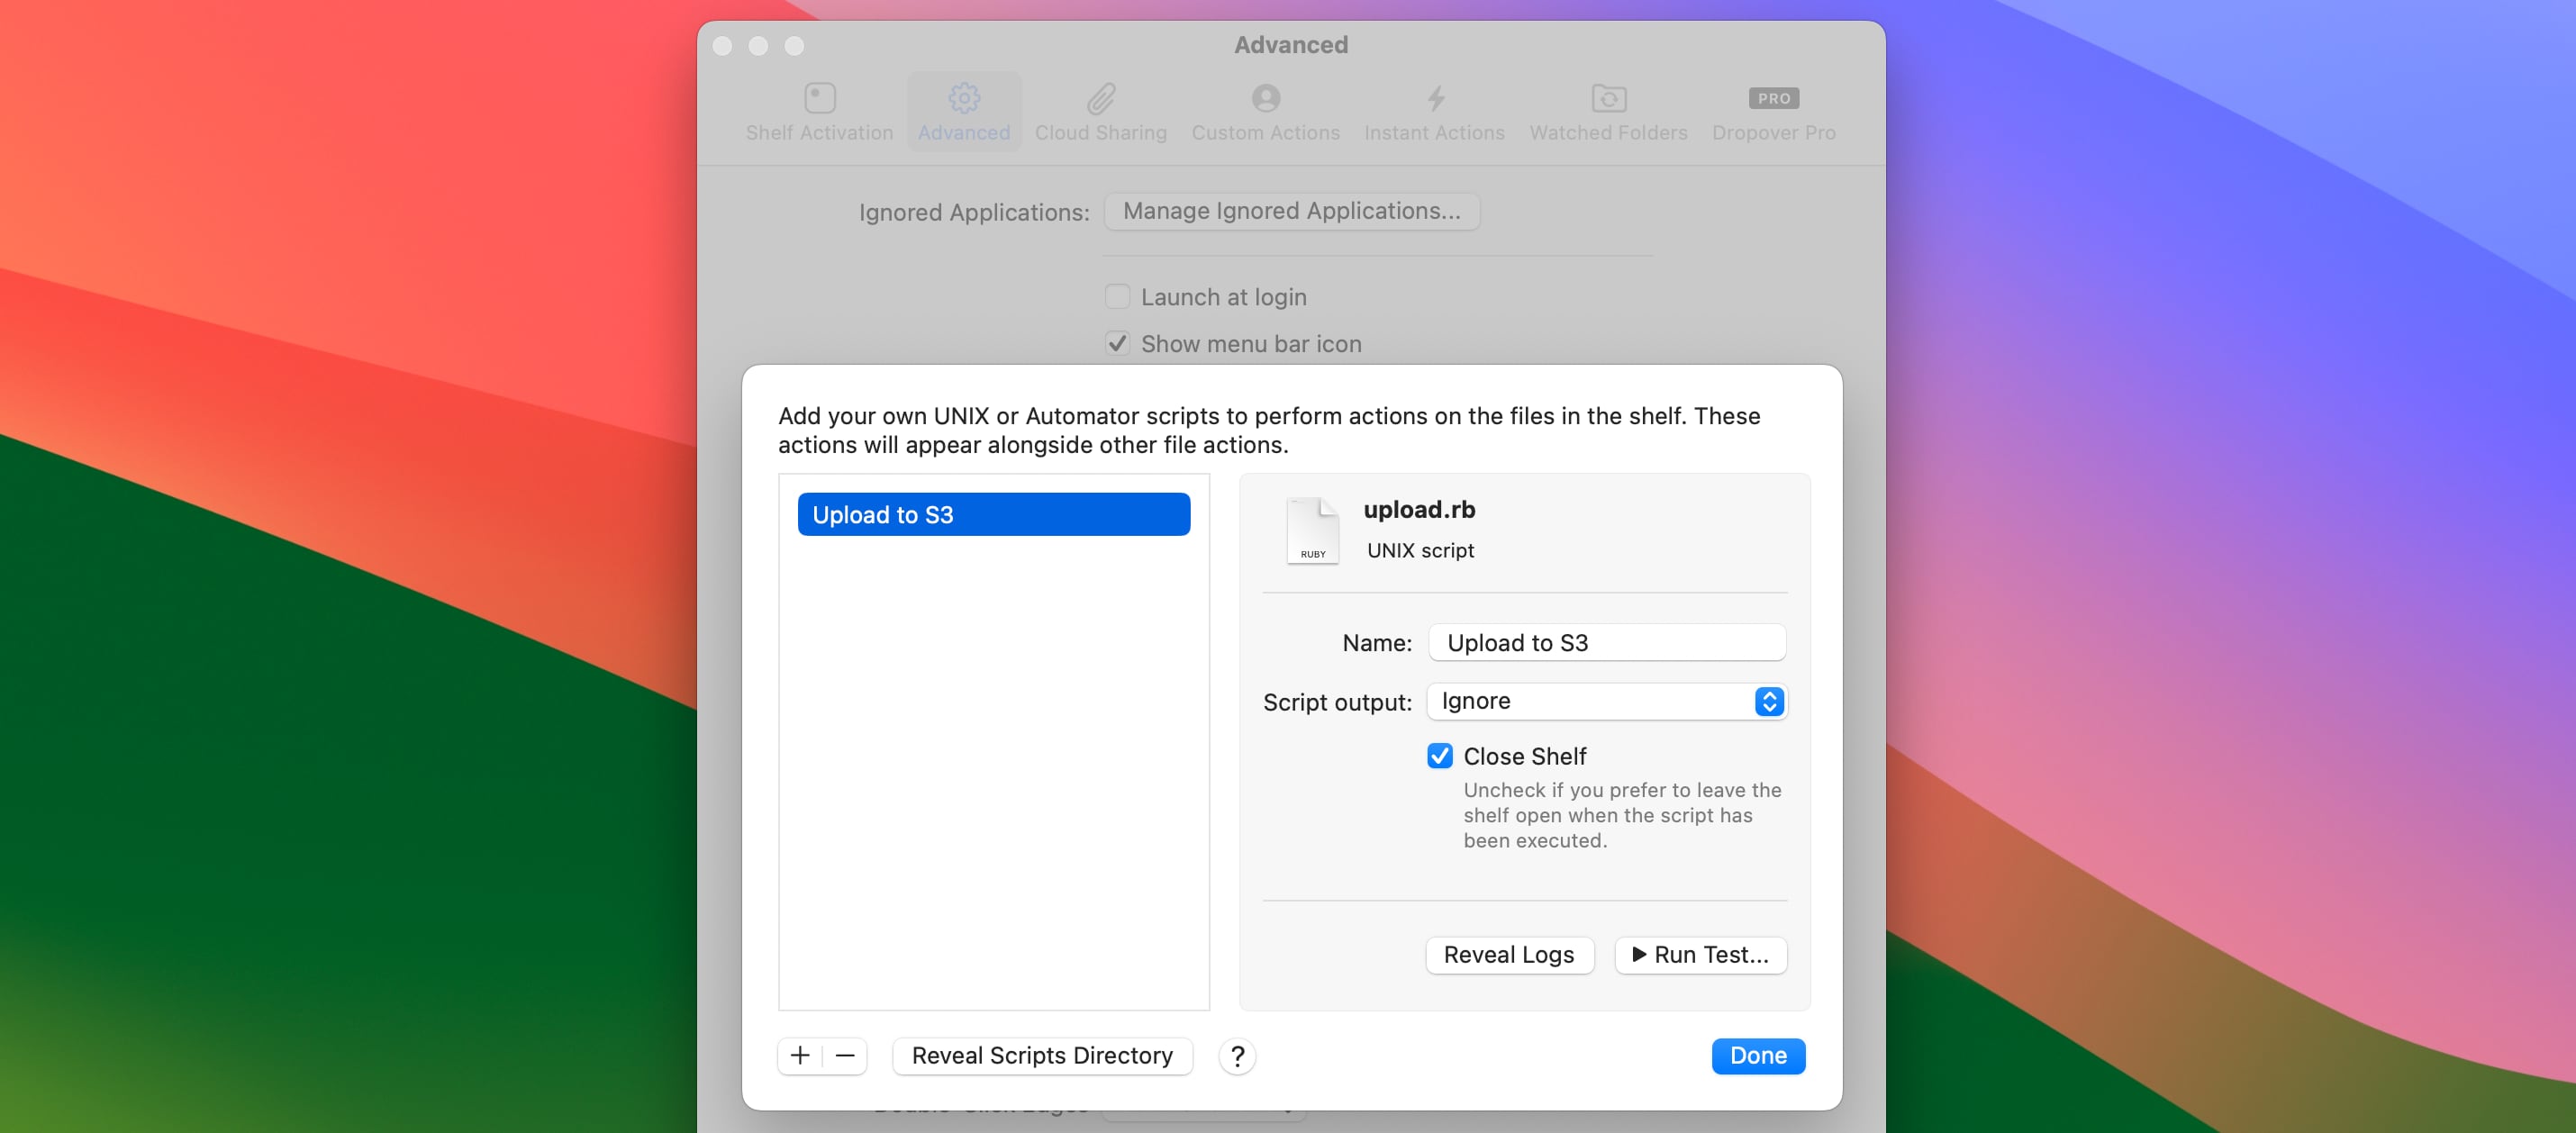 Change the script’s display name, output type or perform a test task with the given script.
Name
The display name for the script. This name will be used in the menu.
Script Output (only for Shell scripts)
By default, all output generated by your script will be ignored. For some scripts, it makes sense to copy the output to clipboard (e.g. when your script generates an URL). In those cases, select the “Copy to Clipboard” option.
Close Shelf
Indicates if the shelf should be automatically closed after your script has been succesffully executed.
Testing a Script
You can easily test your imported script by selecting the “Run Test…” button and selecting the sample files you want to test your script on.
 Verify if the script works by performing a test run.
The test script screen will show the output and result of your script. If an error occurs, it will contain the reason of the failure, allowing you to modify it until the script succeeds.
Script Logs (only for Shell scripts)
Each imported script will have two log files; a output log and an error log. The output log will only be populated if the script succeeds while the error log will contain information about a failure if one occurs. Both of these logs are cleared on each run.
To obtain the logs, select the “Reveal Logs” button on the script detail screen.
Shell Scripts
When Dropover executes your Shell script, it will provide the paths of the files in the shelf as arguments. For example, if you want to upload the contents of the shelf, your custom script could like this:
#!/usr/bin/env ruby

require 'net/http'
require 'uri'

# Loop through each file in the shelf. Each arg will
# represent a full path of the file.
for file in ARGV
  uri = URI.parse("http://#{domain}:#{port}");
  http = Net::HTTP.new(uri.host, uri.port)
  request = Net::HTTP::Post.new(uri.request_uri)
  request.body = File.read(file)

  res = http.request(request)
  puts res.body
end